Henna Brow Guide

Henna brows have made huge advances in recent years. And there are more and more brands on the market that focus on henna. We are active in Brazil since 2006 and we developed a great brow henna product especially for the professional brow stylist. To make the most flawless, natural brows: read this Henna Brow guide and everything you need to know about the product.

What Is Brow Henna?

Brow henna is a product based on Indian henna. Color pigments have been added to give the henna a beautiful light to dark brown color. If you work with pure henna, you will eventually get a reddish print on the skin. That is, for example, the result with traditional henna decorations in many Eastern countries. In addition, the color pigments ensure that the henna draws into the skin more quickly. So you do not have to wait for hours, as is the case with pure henna. Brow henna is therefore never pure nature, which some brands also claim. Our formula consists of 97% Lawsonia Inermis Extract. 

Brazilian Brows Guide

Step 1: Patch test

Just like normal eyebrow and hair dye, people can be allergic to eyebrow henna. Therefore always do a patch test if a customer wants a henna treatment for the first time. Put a speck of henna on her arm, let it retract and remove after 15 minutes. If the customer does not have an allergic reaction within 48 hours, you can use our Henna careless next time. It is handy to ask your client if she wants to visit a few days before her first treatment.

Step 2: First shaping

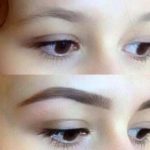
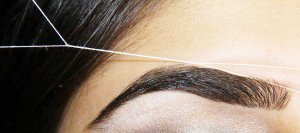
With Brazilian Brows Henna you can create super-tight, natural eyebrows. But only when the eyebrows are well depilated of course. Thread or wax the brows first.

Step 3: Choose the color

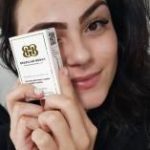
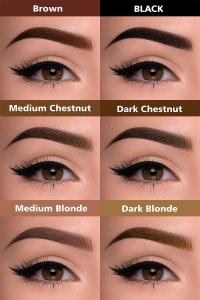
Brazilian Brow Henna is available in6s shades, Black – Brown – Medium Blonde – Dark Blonde – Medium Chesnut – Dark Chestnut. All colors give a natural result. Our black color yourself. You can divide the colors into 2 types, warm tones and cool tones. Brown and the medium colors are the warm colors. Black and the dark colors are the cool colors. Dark Chestnut and Dark Blonde are the most used colors.Take a good look at which color suits your customer, and discuss the wishes very well. It is difficult to determine exactly in advance how a color will develop. This is dependent on skin type. For that reason, it’s better not to go too dark the first time. Repeat the process rather than having a disgruntled customer who finds her eyebrows too dark. Depending on the undertones of skin, the color may turn warmer or cooler. Remember, warm tones and cool tones. Brown and the medium colors are the warm colors. Black and the dark colors are the cool colors. Dark Chestnut and Dark Blonde are the most used colors. Only with experience can you achieve the best results.

Step 4: How to blend the henna?

Mix one scoop of henna powder with 2 drops of our fixer add 8 drops of mineral water (bottled water from the supermarket). Mix until an evenly and smooth substance has formed. The henna paste should not be too fluid if you apply it! But certainly not grainy or thick.
Mixing is the most difficult part of our product. We give you a basic formula that is recommended by the laboratory. As soon as you have the right substance you immediately notice that. You can also replace the mineral water with 4 drops of lens fluid.
Learn to mix henna? You only learn this by doing it !!

Step 5: Cleanse the skin

Make the eyebrows oil-free with a cotton,alcohol 70%. With clean skin, the henna will stain better. But don’t exaggerate!

Step 6: Apply Brazilian Brow Henna

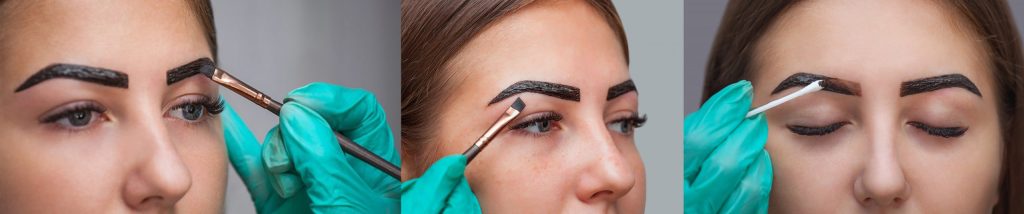
Apply the henna with an angled brush. Stamp and press the henna into the skin and make sure the henna is evenly on the skin. Start at the last part of the eyebrows, and work forward. Make sure the entire eyebrow is covered with a thick layer of henna paste. All skin must be covered!


Step 7: Super-tight, natural eyebrows

By applying Brow Henna with a slanted brush, you can work extremely precisely. Remove small irregularities with a cotton swab. Finally, tighten the eyebrow with a cotton swab. 

Step 8: Develop time

Allow the henna to stay on the skin for 10 till 20 minutes. The longer the henna stays on the skin, the more intense the color will be. With experience you become good at this. Follow your heart! Brazilian Brows is made for the specialist who wants the best results for his customers.

Step 9: Remove the front part

The most beautiful eyebrow is an eyebrow with an ombre effect. Whether it is applying make-up, permanent make-up or eyebrow henna. In other words, the eyebrow goes from light to dark. That is why you remove the attack earlier. After 10 minutes. Use a cotton swab (with water) as thickness to keep both eyebrows as even as possible.

Step 10: Remove the rest of the henna

After another 15 to 20 minutes, you can remove the rest of the brow henna with a cotton pad that has been moistened with water . Result: a beautiful henna layer on the skin that last for 5-14 days.

Brow Henna aftercare

To ensure that your client enjoys her Henna Brows for as long as possible, you can provide her with the following tips: • Do not wet the eyebrows for the first 24 hours• Use as little cleaning products as possible• Do not apply too many creams to the eyebrows